Intex Surface Solutions Logo
INTEX SURFACE SOLUTIONS

How To Repair Marble

Marble restoration can involve anything from repairing isolated scratches and etches to completely refinishing a worn surface. The exact process depends on the condition of the stone, the type of damage and the finish being produced.

In this article, we’ll use a heavily worn marble kitchen island as the main example and follow the restoration from assessment and preparation through grinding, refinishing and sealing. Along the way, we’ll also look more broadly at the honing and polishing techniques used on marble and other natural stones, including situations that extend beyond this particular project.

Assessment of the stone

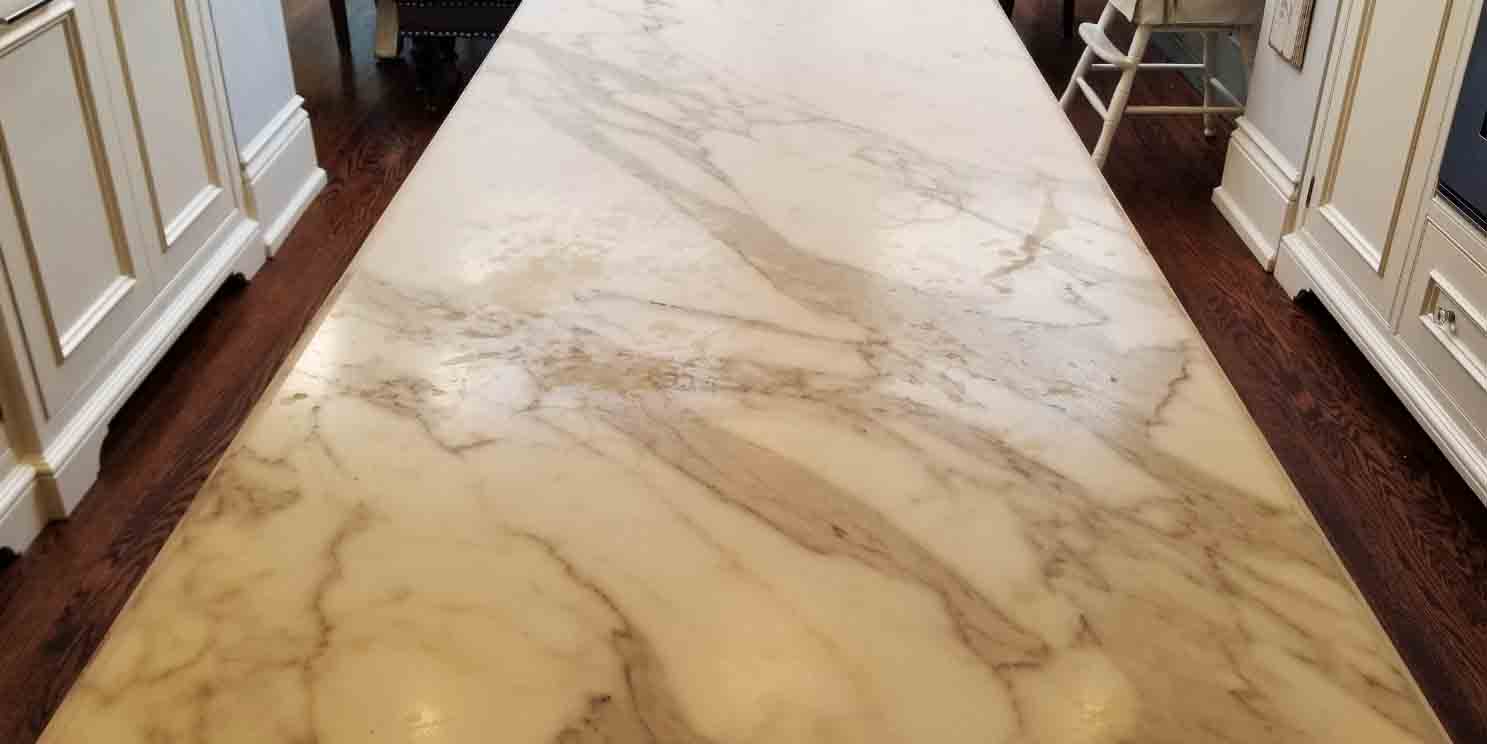
Before starting the project, it’s important to take a thorough look at the damage to the marble. Key things to look for are the depth of scratches and etches, where they are located and whether special equipment will be needed to access hard to reach spots. Once assessed, it’s helpful to make a quick sketch of the space noting any damage that needs special attention, this includes extremely deep scratches and etches as well as chips that should be prepared and filled before grinding.
• Assess the depth and location of scratches, etches and general wear
• Check access around fixtures, edges, corners and other tight areas
• Identify chips, cracks or repairs that may require epoxy before refinishing

Read More ▾
The assessment helps determine where the restoration should begin and how much material actually needs to be removed. A lightly etched surface may require very little grinding, while deeper scratches or uneven wear can require a more aggressive starting abrasive.

We also look for isolated areas of damage that can be treated independently rather than unnecessarily grinding the entire surface to the same depth. Chips, cracks, open fissures and failed previous repairs are identified at this stage so they can be prepared and filled at the appropriate point in the process.

Access is also important. Fixtures, backsplashes, inside corners, edges and other confined areas may require smaller machines, hand tools or a different sequence than the main surface.
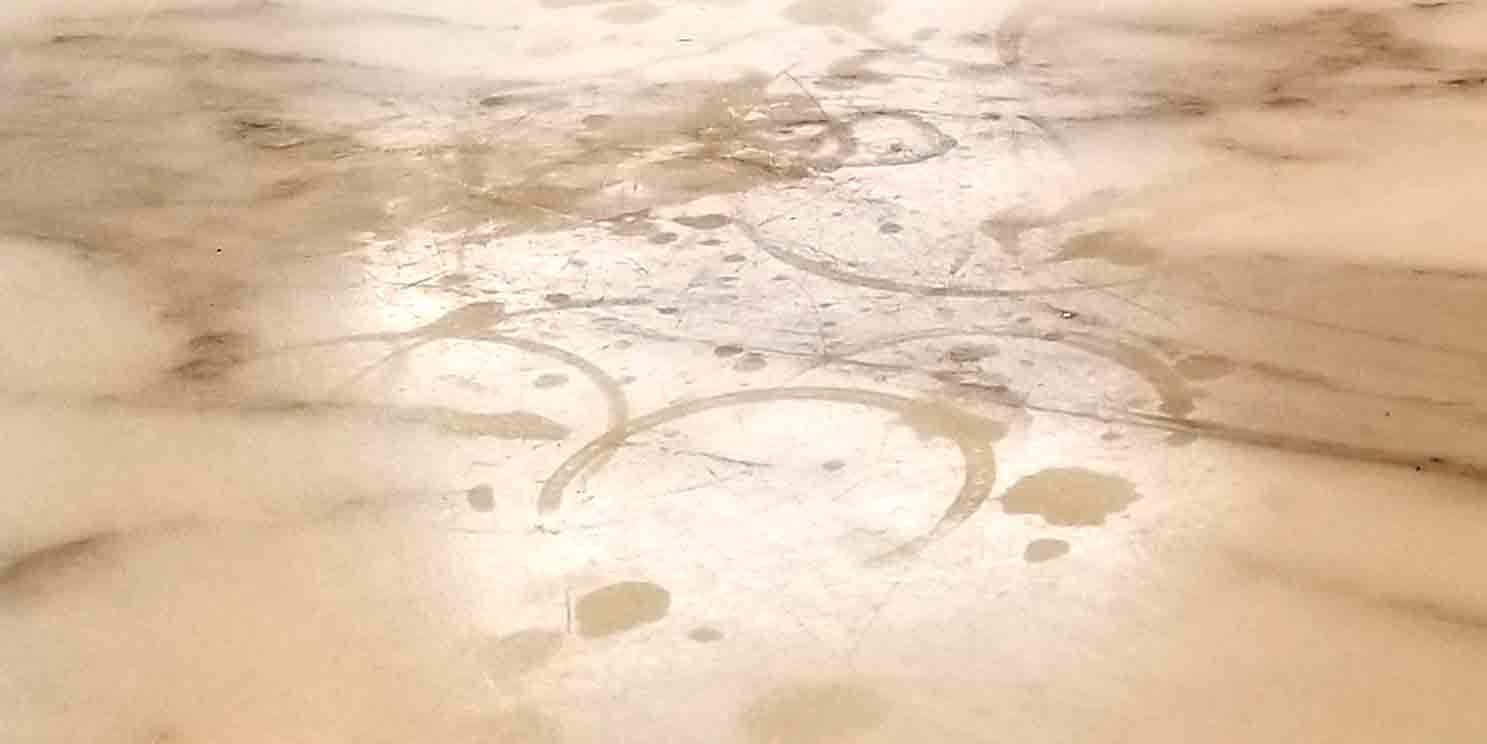
Marble countertop etches
After examining the countertop closely, we determined that a relatively aggressive starting diamond would be needed to remove the deeper etches and scratches before refining the surface with progressively finer abrasives.

Discussion With the Client

At this point, we briefly discuss the expectations for the repair as well as share any suggestions for the finish to promote longevity or to adjust the finish to better suit our clients vision. Regarding expectations this usually involves discussing permanent damage, such as a stain that had penetrated deeply into the material, or a bruise within the stone that cannot be repaired. Being upfront with you about our own expectations and capabilities makes for an honest and straightforward experience. With finishes, we will often ask clients the type of traffic their floor or countertop sees and whether a more durable finish is suggested, even if it’s only for a few years. Oftentimes we will hone a countertop if there are young children in the home with the plan to eventually re-polish it once they are older and a bit more careful not to spill things onto the counter. We make time to also answer any questions or concerns that may have come up with regards to the process, products used and expected timeframe for the work.

At this point, we briefly discuss the expectations for the repair as well as share any suggestions for the finish to promote longevity or to adjust the finish to better suit our clients vision. Regarding expectations this usually involves discussing permanent damage, such as a stain that had penetrated deeply into the material, or a bruise within the stone that cannot be repaired. Being upfront with you about our own expectations and capabilities makes for an honest and straightforward experience. With finishes, we will often ask clients the type of traffic their floor or countertop sees and whether a more durable finish is suggested, even if it’s only for a few years. Oftentimes we will hone a countertop if there are young children in the home with the plan to eventually re-polish it once they are older and a bit more careful not to spill things onto the counter. We make time to also answer any questions or concerns that may have come up with regards to the process, products used and expected timeframe for the work.

• Discuss the expected final finish and level of lustre
• Review any damage that may not be completely removable
• Consider traffic, maintenance and how the surface is used
• Confirm products, curing times and expected project duration

Read More ▾
This is also when we discuss whether the existing finish still makes sense for the way the space is being used. A polished, Patina or honed finish can each perform very well, but they show etching, scratching and general wear differently. In some applications, a softer finish may make everyday damage less noticeable even though the stone itself has not become more durable.

For the kitchen island used in this article, the existing satin finish had developed significant visible wear. After discussing how heavily the countertop was used, we decided that a duller honed finish would be more forgiving and easier for the homeowner to live with.

We also review the products and techniques being used, any relevant odours or curing periods, and the expected timeframe for the work. Most importantly, we try to be clear about what we believe can realistically be achieved before the restoration begins.

Preparation of the Work Area

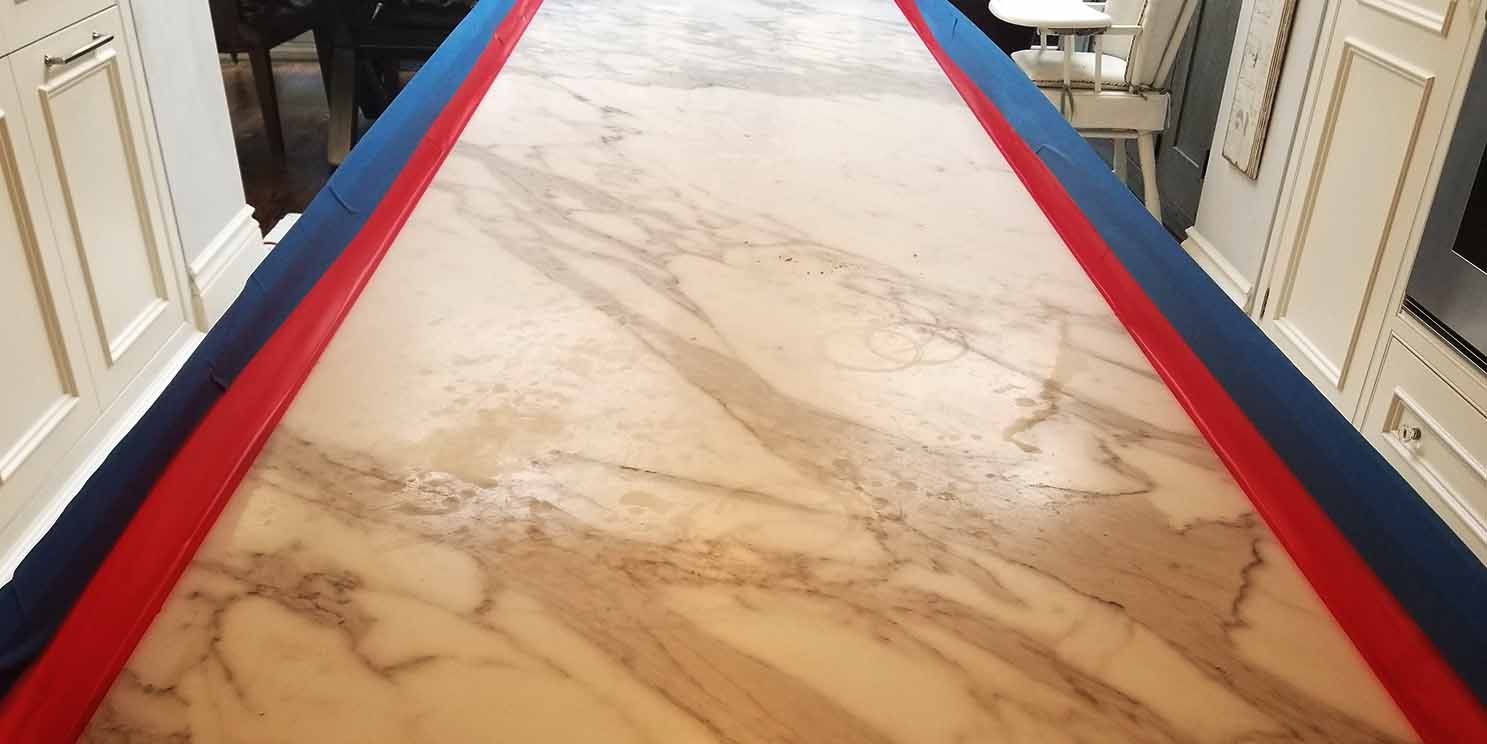
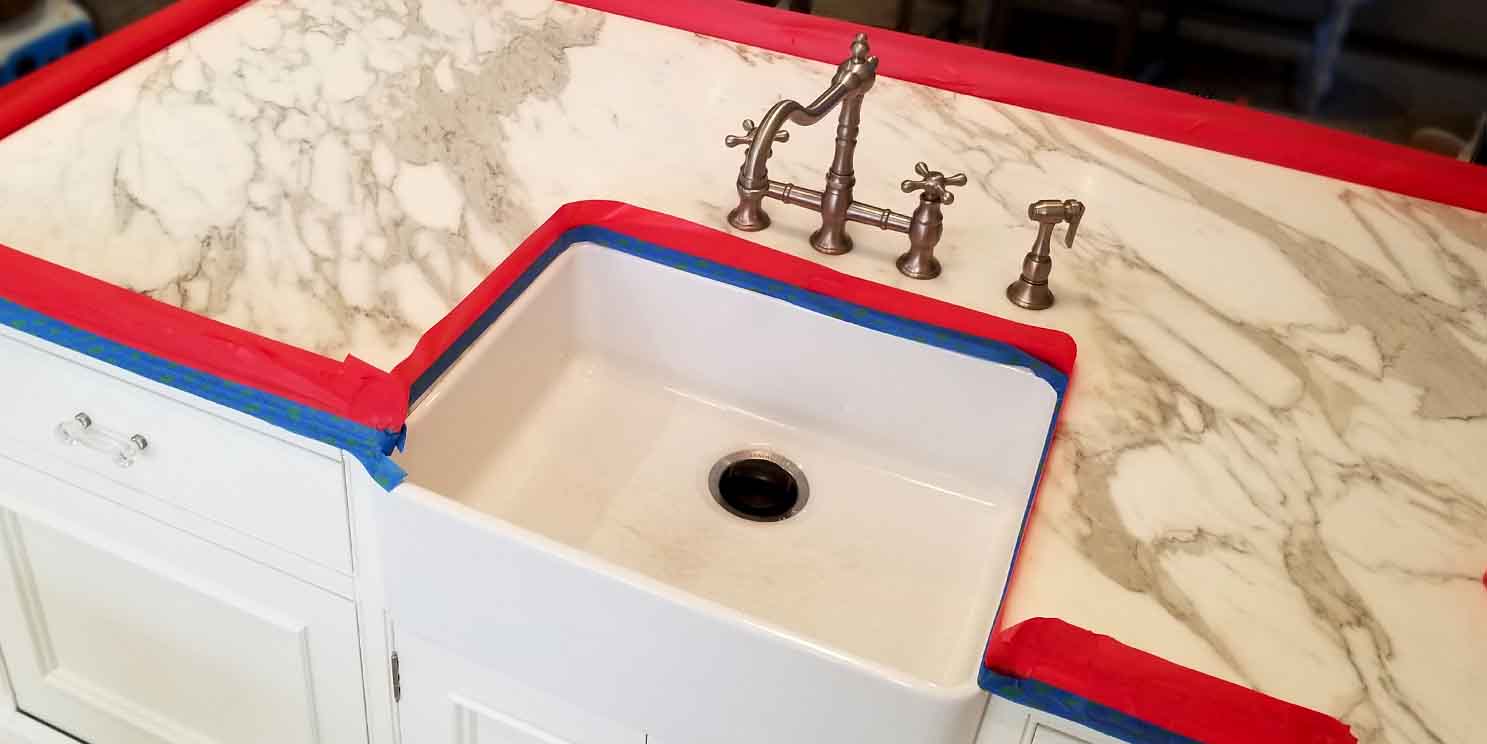
Before bringing equipment into the space, clean drop cloths are put down wherever we are working or want to be sure doesn’t get dirty. Where possible, we use reusable, washable cloth drop sheets in leu of plastic to keep our environmental impact as low as possible. The next step is taping seams, edges, and fixtures. Like most detailed work, “it’s all in the prep”. In this case we put a tape wall across the edges of the countertop. Tape prep starts with a solvent wash across the edges to promote adhesion and prevent leaks. Applying a tape wall is time consuming, but allows us to work cleanly without putting rough layers of plastic across the cabinets throughout the kitchen, this is again to keep our waste down. We tape all junctions between our drop sheets and the work area. At this point we bring in our equipment.
• Protect floors and surrounding surfaces with clean drop cloths
• Tape edges and seams to control water and slurry
• Protect fixtures, cabinetry and adjoining finishes
• Organize equipment before work begins

Read More ▾
Where practical, we use reusable washable drop cloths rather than covering large areas with disposable plastic. Around countertops, we often create a small taped barrier directly along the edge of the stone to contain water while keeping the surrounding cabinetry accessible and protected.

Before applying tape, adjoining surfaces may be cleaned where necessary so the tape adheres properly and does not lift during wet grinding. The exact preparation varies with the installation, but the goal is always the same: keep the work area controlled, protect finished surfaces and reduce unnecessary mess or waste.

Once the protection is in place, the equipment needed for the particular repair is brought into the space and organized before refinishing begins.
marble countertop
Protective tape barriers and reusable drop cloths help contain water and slurry without unnecessarily covering the entire surrounding area in disposable plastic.

Main Equipment

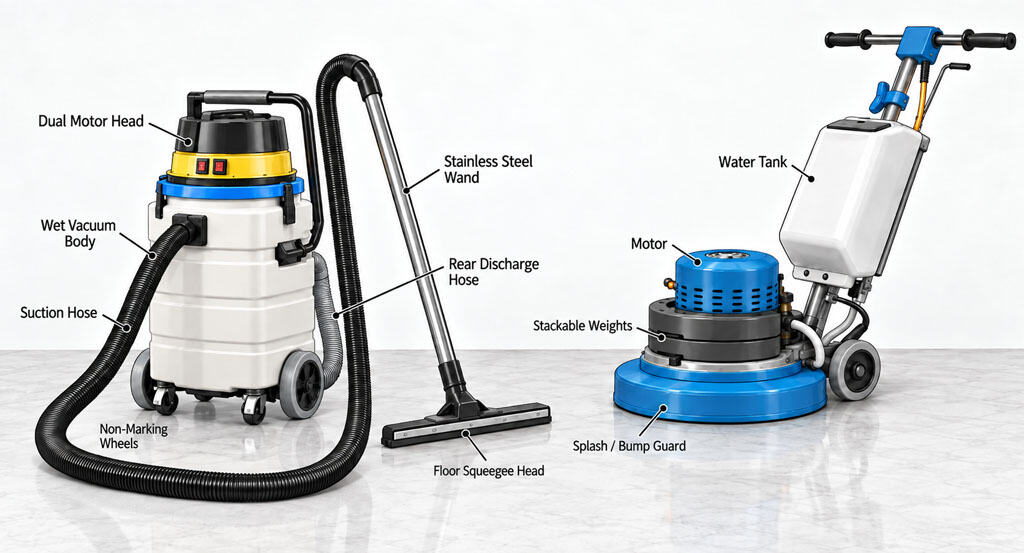
Our resurfacing and polishing equipment consists of various small grinding machines, full sized countertop machines and both single drive rotation and planetary floor machines. In essence they all perform the same task, but are used to access different sized areas or apply heavier or more aggressive grinding when needed. Water collection is done with powerful wet vacuums, typically with variable suction. Our tools are locally sourced whenever possible.
• Grinding and polishing machines sized to suit the work area
• Single-disc and planetary equipment for different resurfacing requirements
• Wet vacuums for water and slurry collection

Read More ▾
Our resurfacing equipment ranges from small hand-held machines for edges and confined areas to larger countertop and floor machines. Although the basic purpose is similar—controlling an abrasive across the stone—the size, weight and movement of the machine can significantly affect how aggressively and evenly the surface is refinished.

We use both single-disc and planetary equipment depending on the material, condition of the surface and size of the area being restored. Heavier equipment can provide more consistent cutting across larger surfaces, while smaller machines allow us to work around fixtures, edges and other areas where access is limited.

Because most of our grinding and refinishing is performed wet, water and stone slurry are collected throughout the process using wet vacuums and other water-control methods.
Wet Vac and Floor Polisher Marble Restoration Equipment
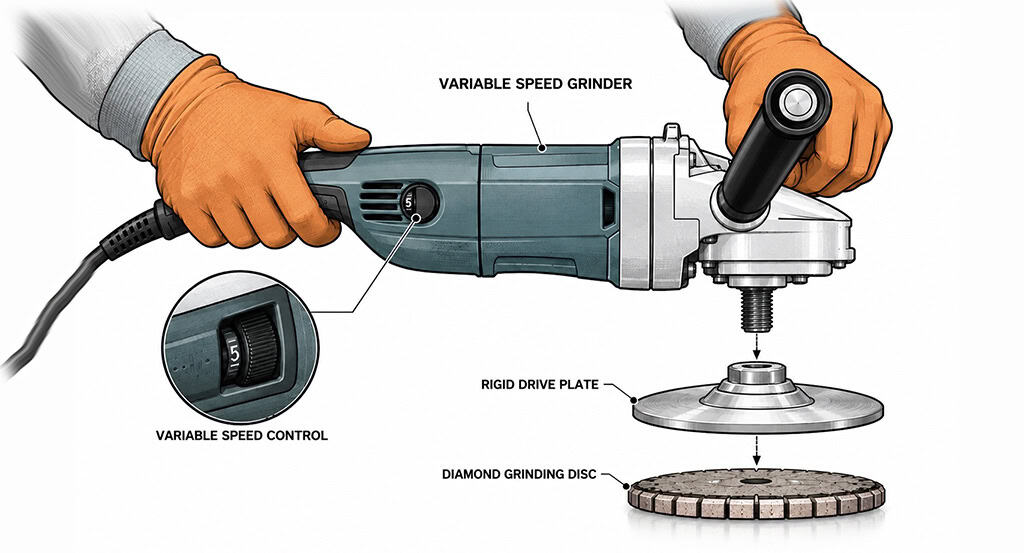
Restoring a one of a kind onyx table variable speed grinder with rigid diamond disc and drive

Diamond Discs

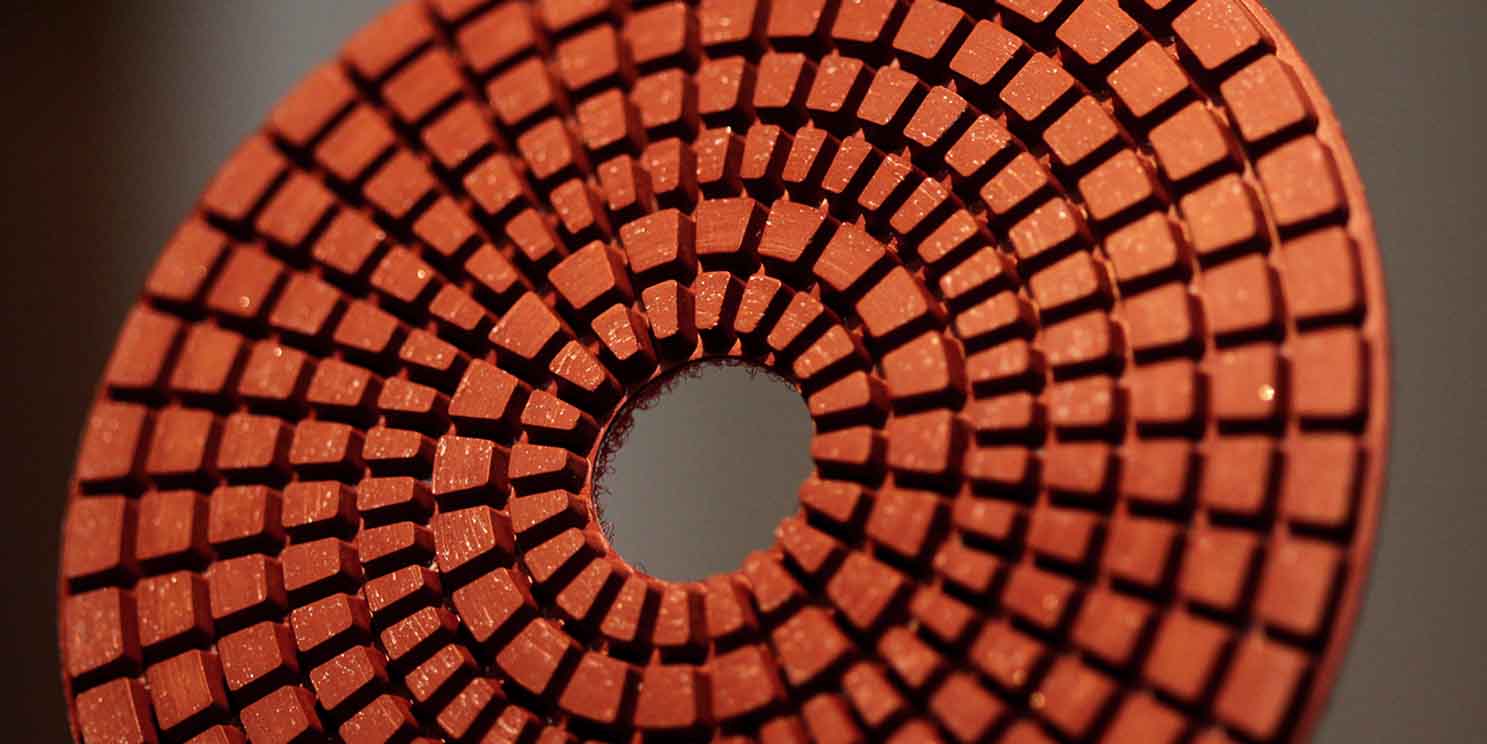
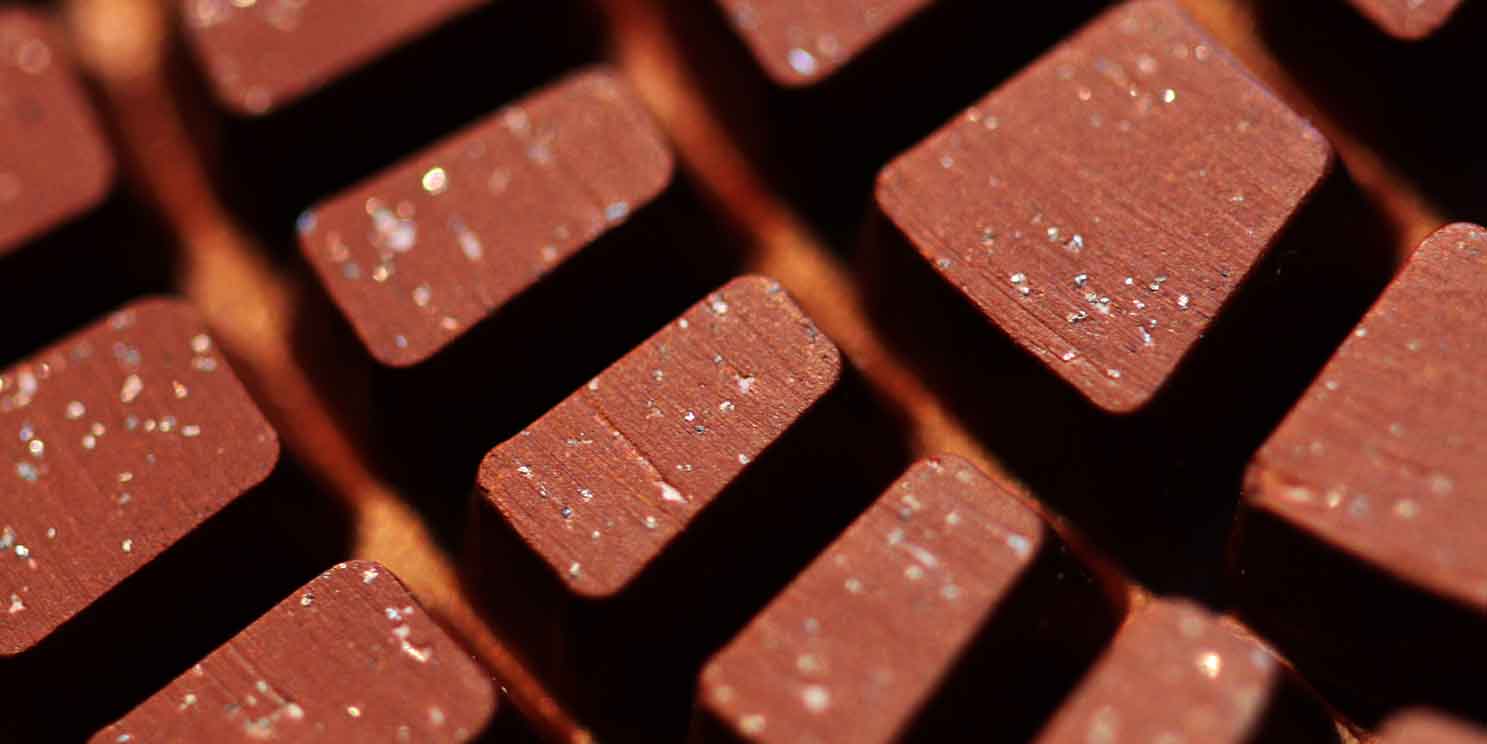
Removing damage from a surface is a delicate process. Removing too much material will cause deflections and dips in the surface, while removing too little won’t remove scratches or etches. We use premium resin bonded diamond abrasive discs. These discs are composed of various grits of diamond abrasive, stabilized in a resin. The shape of the disc is meant to keep water under the machine and prevent overheating of both the resin and the stone. In hard to reach places we have small versions of these discs as well as hand pads and other specialized tools.
• Resin-bonded diamond abrasives in a range of grit sizes
• Used progressively from more aggressive to finer stages
• Smaller discs and hand pads for edges and confined areas

Read More ▾
Removing damage from natural stone is a controlled process. If too much material is removed, the surface can develop visible dips or distortions; if too little is removed, deeper scratches and etches may remain.

For most marble refinishing, we use resin-bonded diamond abrasives in a range of grit sizes. Coarser discs are used when more material needs to be removed, followed by progressively finer abrasives to refine the surface and prepare it for the final honed, Patina or polished finish.

The exact starting point and number of stages depend on the stone, the depth of the damage and the finish being produced. There is no fixed grit sequence that applies to every project.

For edges, corners and areas around fixtures, we use smaller diamond discs, hand pads and other specialized tools so those areas can be refined as consistently as possible with the main surface.
Resin-bonded diamond abrasives are available in progressively finer grits. The close-up shows the abrasive particles held within the resin matrix.

Wet Grinding

• Uses water to control dust and carry away removed material
• First major resurfacing stage when scratches, etches or wear need to be removed
• Progressively finer diamonds refine the surface after the initial cut
• Localized damage can be feathered independently to avoid unnecessary grinding
• Open holes or fissures can be filled as they are exposed

Read More ▾
Wet grinding is the first major resurfacing stage on many marble restoration projects. The process begins with a diamond abrasive aggressive enough to remove the existing damage, followed by progressively finer abrasives that refine the surface and reduce the scratch pattern left by the previous stage.

The starting grit depends on the condition of the stone. Light etching may require only a relatively fine abrasive, while deeper scratches, heavy wear or unevenness may require a more aggressive starting point. There is no fixed number of grinding stages; the sequence is adjusted to the material, the depth of the damage and the finish being produced.

Where damage is isolated, we can often grind and feather that area independently before blending it into the surrounding surface. This avoids removing more material than necessary across the entire countertop or floor and helps minimize visible dips or distortion in the final finish.

Grinding is performed wet wherever practical. The water lubricates the abrasives, helps control heat and captures the removed stone and abrasive material in a slurry that can be collected with a wet vacuum rather than becoming airborne dust.

As the surface is opened during grinding, natural holes, fissures or failed fills may also become visible. These can be cleaned and repaired with appropriately matched epoxy before the refinishing process continues.
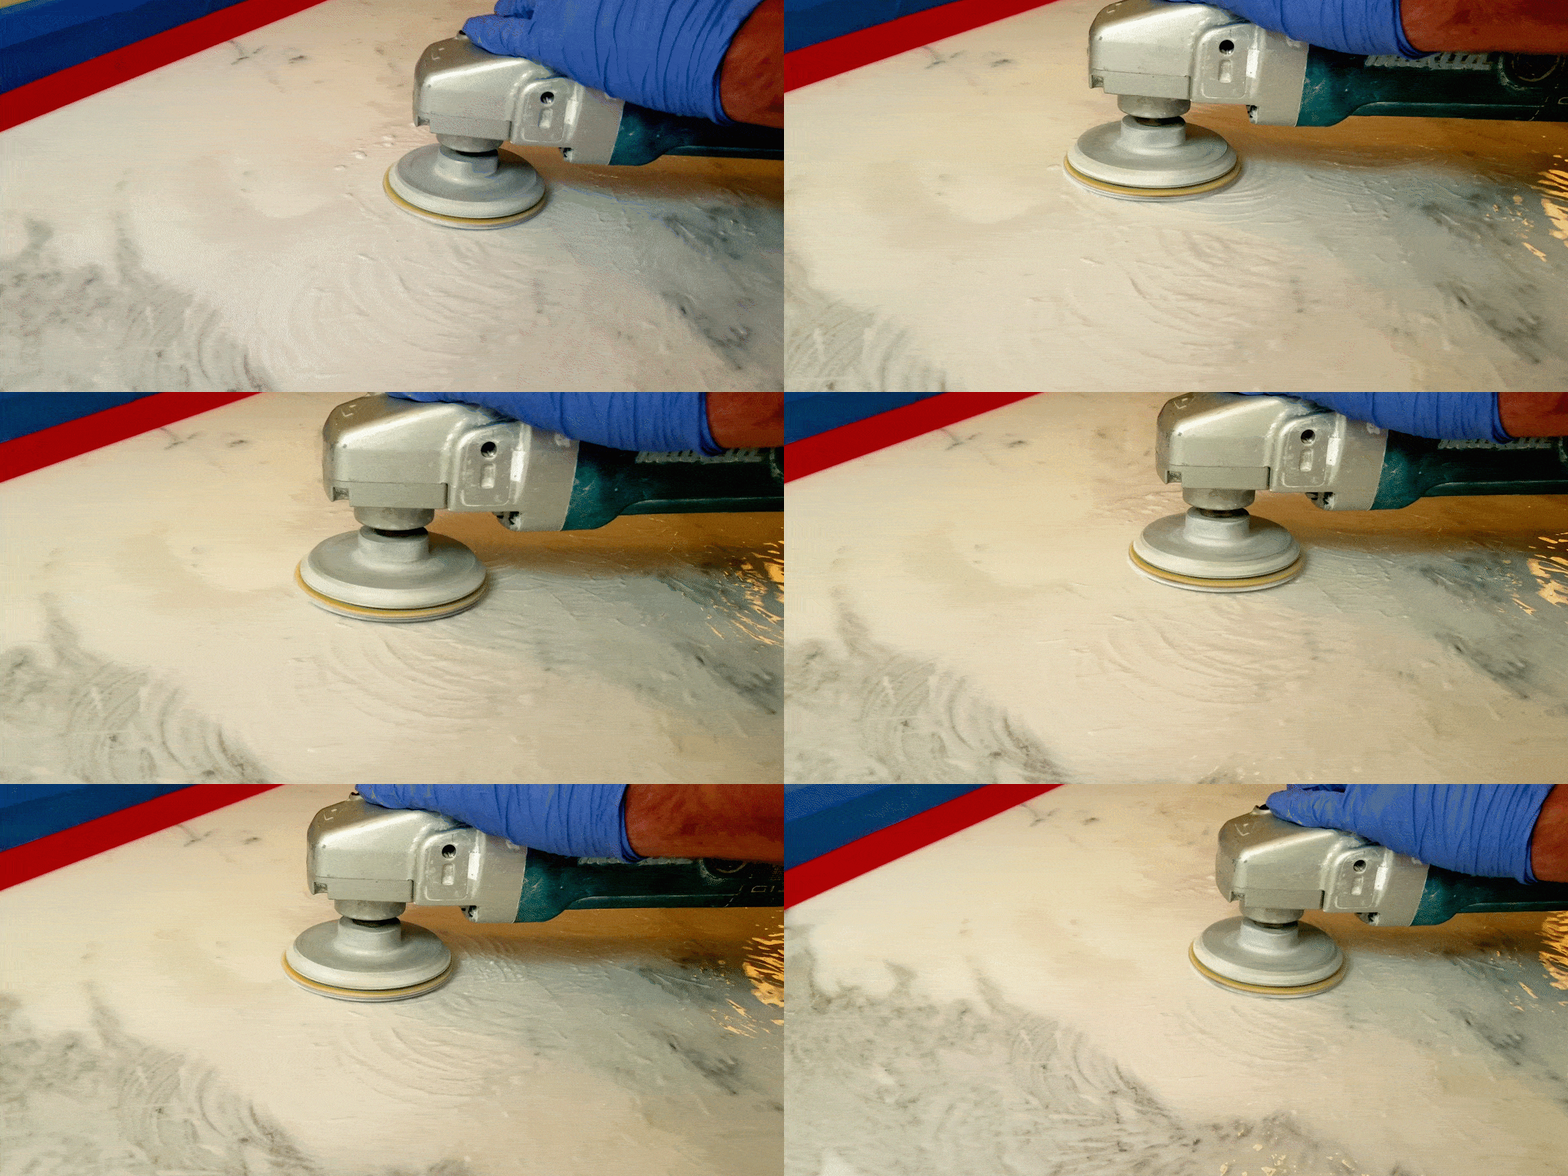
Resin diamond grinding
An isolated deep scratch is being ground and feathered before the full countertop is refinished. Working the repair across a wider area helps minimize depressions or distortion in the final surface.

Marble Honing Techniques

• Finish can be adjusted from a deep matte hone to a softer satin lustre
• Mechanical honing using progressively refined diamond abrasives
• No chemical honing methods used
• Produces a smooth, consistent, low-reflection surface

Read More ▾
Honing is a mechanical refinishing process used to create a smooth surface with less reflection than a full polish. Once the grinding stages have removed the original damage and established an even surface, progressively finer diamond abrasives and pads are used to refine the remaining scratch pattern until the desired level of lustre is achieved.

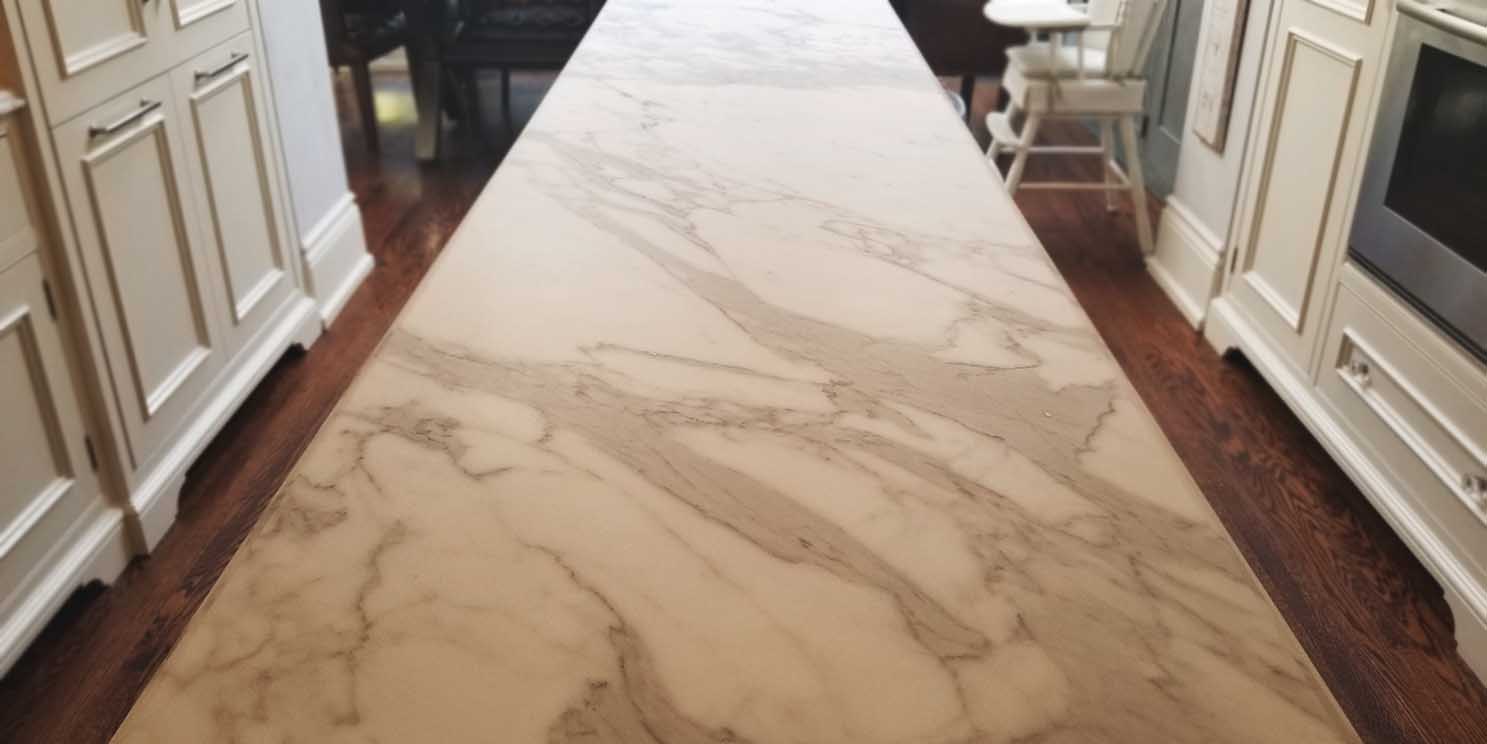
The finish can be adjusted considerably. A deep hone can be left very matte, while further refinement produces a smoother, more reflective satin finish that we refer to as Patina. The appropriate stopping point depends on the stone, the intended appearance and how the surface will be used.

We prefer to produce honed finishes mechanically rather than intentionally dulling the stone with acidic treatments. Acid reacts with calcite-based stones such as marble, so using that reaction to create a finish introduces another variable into a process that we can otherwise control directly with abrasives. Marble's sensitivity to acidic solutions is well established.

Mechanical honing also gives us more control over consistency, particularly where different veins or mineral areas respond differently during refinishing. Rather than trying to force every stone through the same fixed grit sequence, we adjust the abrasives and final refinement according to how the particular material responds.
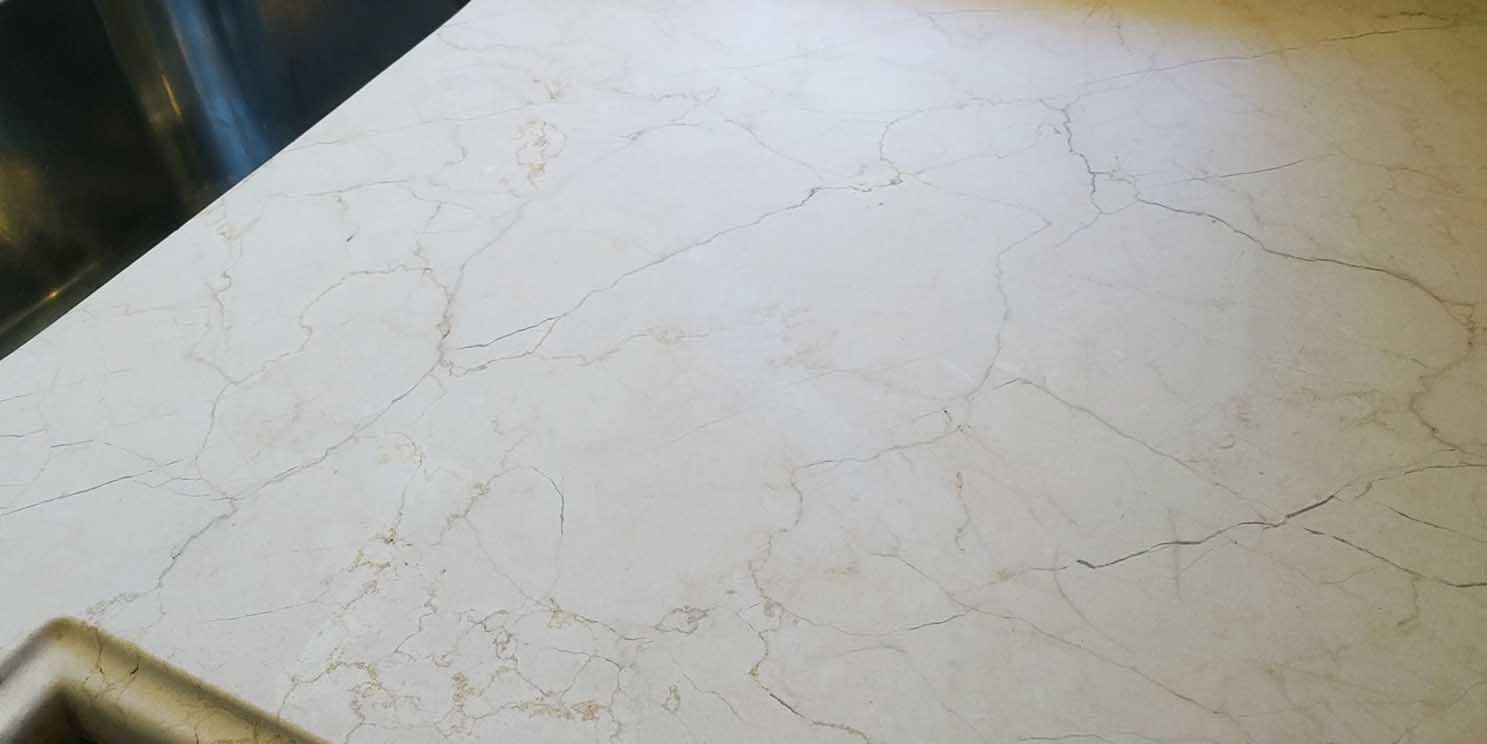
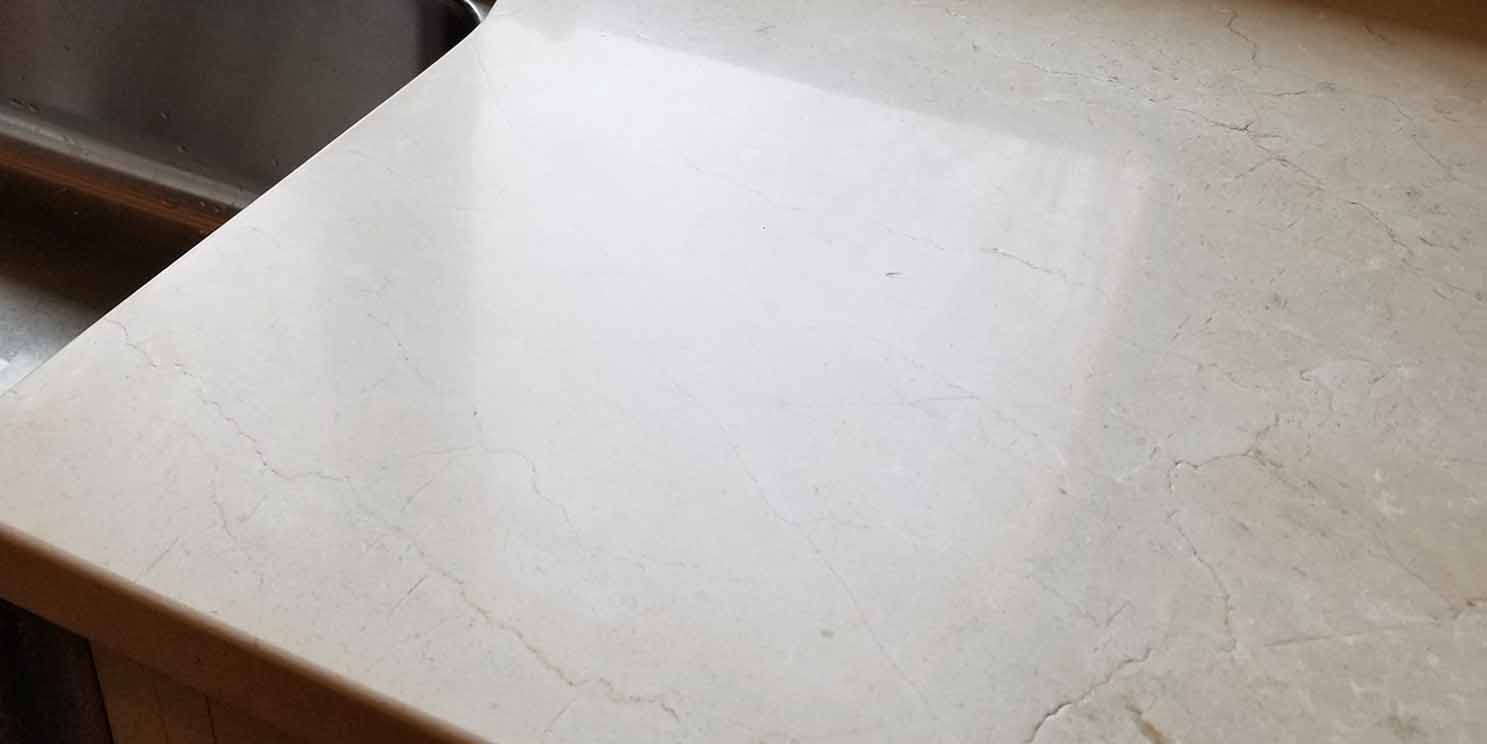
Both countertops are the same type of marble and were photographed under similar lighting. The first has a deep matte hone, while the second has been refined further to produce our smoother, more reflective Patina finish.
View Honed Marble Gallery ▶

Marble Polishing Techniques

• Mechanical refinishing followed by marble polishing compounds
• Polishing system adjusted to the individual stone
• Wet methods used wherever practical
• Final clarity and reflection developed gradually

Read More ▾
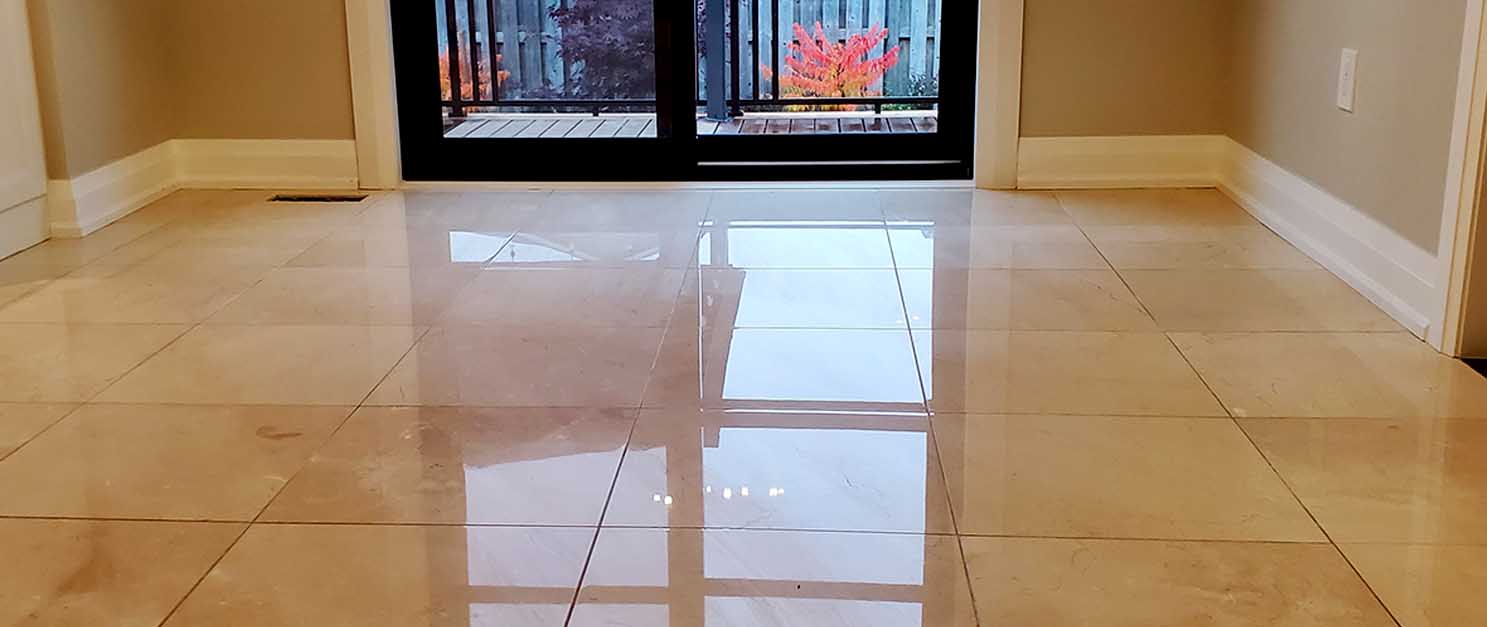
Polishing is the final refinement stage used to produce a high-gloss marble finish. Once scratches, etches and other surface damage have been removed with diamond abrasives, the stone is progressively refined before polishing compounds and pads are used to develop clarity, depth and reflection.

The exact process varies with the stone. Different marbles respond differently to abrasives, polishing compounds, machine pressure and water, so there is no single grit sequence or number of passes that applies to every material.

We use wet refinishing methods wherever practical because they help control dust, manage heat and carry removed material away from the surface. The final polish is developed gradually until the stone reaches the level of clarity and reflection we are looking for.

We do not use crystallization as part of our standard polishing process. Crystallization relies on a chemical reaction at the marble surface to produce shine, whereas we prefer to restore and refine the stone mechanically before completing the finish with conventional marble polishing compounds.

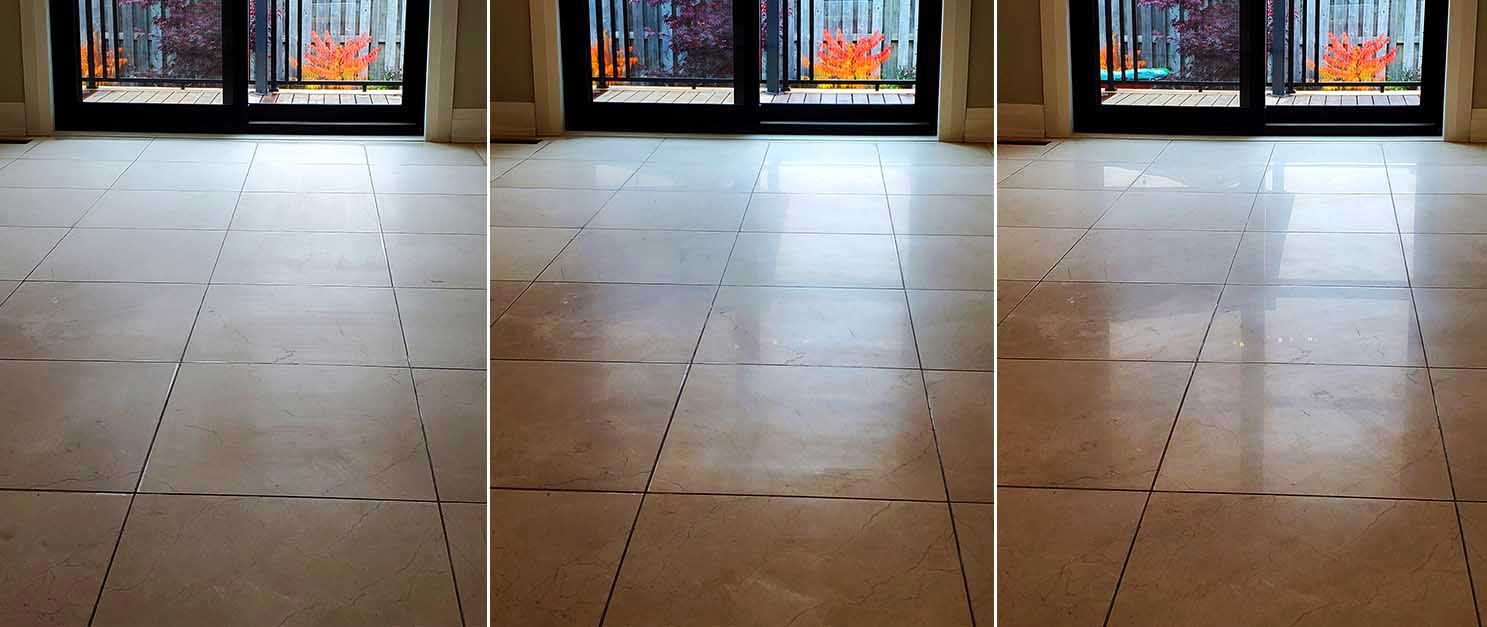
The first image shows three stages of consecutively smoother diamond grinding. The next image is after polishing.
View Polished Marble Gallery ▶

Cleaning & Teardown

• Remove slurry and polishing residue from the stone and surrounding area
• Inspect the finished surface before removing protection
• Clean adjoining surfaces and equipment as the work area is dismantled
• Allow the stone to dry fully before final evaluation and sealing

Read More ▾
Once the grinding, honing or polishing stages are complete, the surface is thoroughly cleaned to remove any remaining slurry, polishing residue and loose material. Wet vacuums, clean water and stone-safe cleaners are used as needed so the true condition of the finish can be evaluated.

Before the protective materials are removed, we inspect the stone under the available lighting and from different viewing angles. This helps identify any remaining haze, uneven reflection, missed scratches or areas that may need additional refinement before the work area is dismantled.

Tape, drop cloths and other protection are then removed carefully. 

Where sealing is planned, the stone is allowed to dry fully before the sealer is applied. Trapped moisture can interfere with penetration and make it difficult to judge how the finished stone is actually responding.

Sealing

• Assess whether the stone actually needs sealing
• Select a penetrating sealer suited to the material and application
• Food-contact-safe sealers used where required
• Apply only after the stone has dried properly
• Remove excess product and allow appropriate curing time

Read More ▾
Sealing is typically the final stage of the restoration process. We use penetrating sealers selected according to the stone, its porosity and how the surface will be used.

These products are designed to reduce the absorption of water, oils and other contaminants without creating a visible film on the surface.

For kitchen countertops, tables and other food-preparation surfaces, we use penetrating sealers that are suitable for food-contact applications once fully cured.

The stone must be sufficiently dry before sealing so the product can penetrate properly and trapped moisture does not interfere with the result. Excess sealer is removed according to the manufacturer’s instructions, and the surface is then allowed the appropriate curing time before normal use resumes.

Sealing can help reduce staining, but it does not make natural stone waterproof, stain-proof or resistant to etching. Future resealing should be based on how the stone is actually performing rather than on a fixed schedule.

Final Results

• Surface damage removed and finish restored evenly
• Final hone adjusted to suit the way the countertop is used
• Stone cleaned, dried and sealed before completion
• Finished surface inspected under natural and artificial light

Read More ▾
After the grinding and refinishing stages were complete, the deeper etches, scratches and general wear had been removed and the countertop was brought back to a consistent finish.

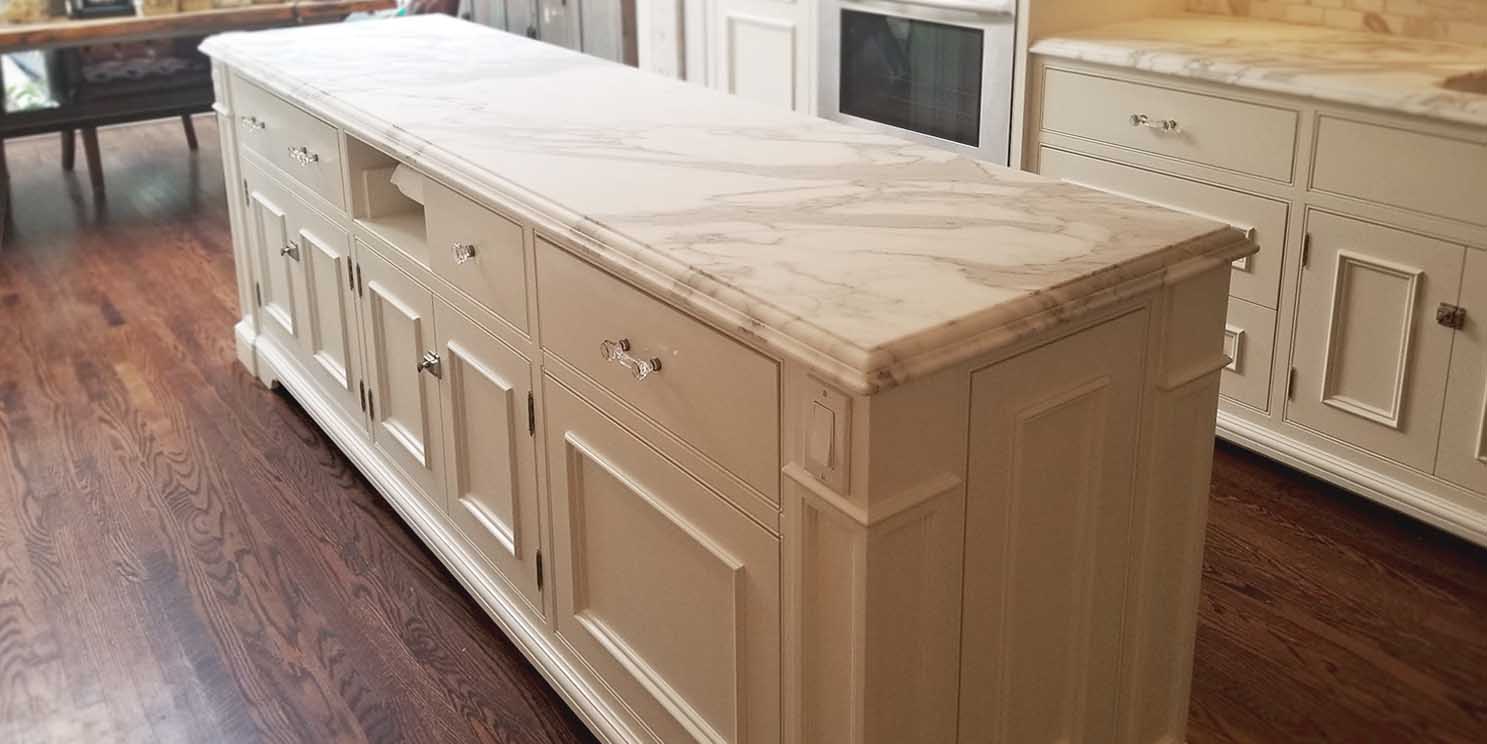
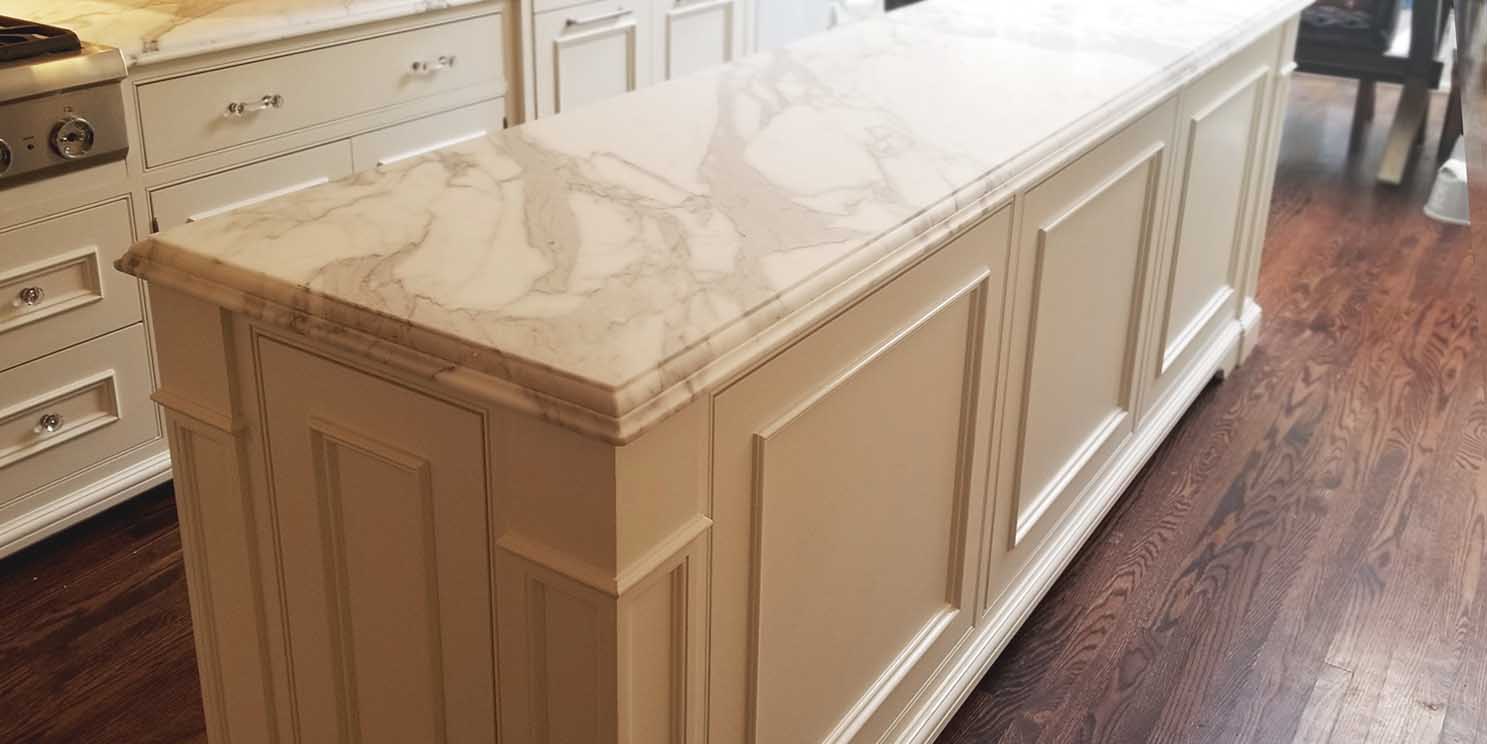
For this kitchen island, we chose a dull honed finish rather than recreating the original satin appearance. The stone itself is no more resistant to etching, but the lower-reflection surface makes minor future etches and everyday wear considerably less noticeable.

Once the finish was complete, the countertop was thoroughly cleaned, allowed to dry and treated with a penetrating sealer suitable for use on food-contact surfaces once fully cured.

The final result was a smooth, even surface that better suited the way the kitchen was being used while preserving the natural colour, veining and character of the marble.
Back to the Top ▲
Intex Surface Solutions Logo
INTEX SURFACE SOLUTIONS
Intex Surface Solutions Logo
INTEX SURFACE SOLUTIONS
instagram logointex surface solutions houzz logo
© 2026 INTEX SURFACE SOLUTIONS LTD.
crossmenu